Written by
Chamitha Lokuwithana — Ex-VicRoads Licence Testing Officer
1,800+ official drive tests conducted · Founder, Lessons2Drive
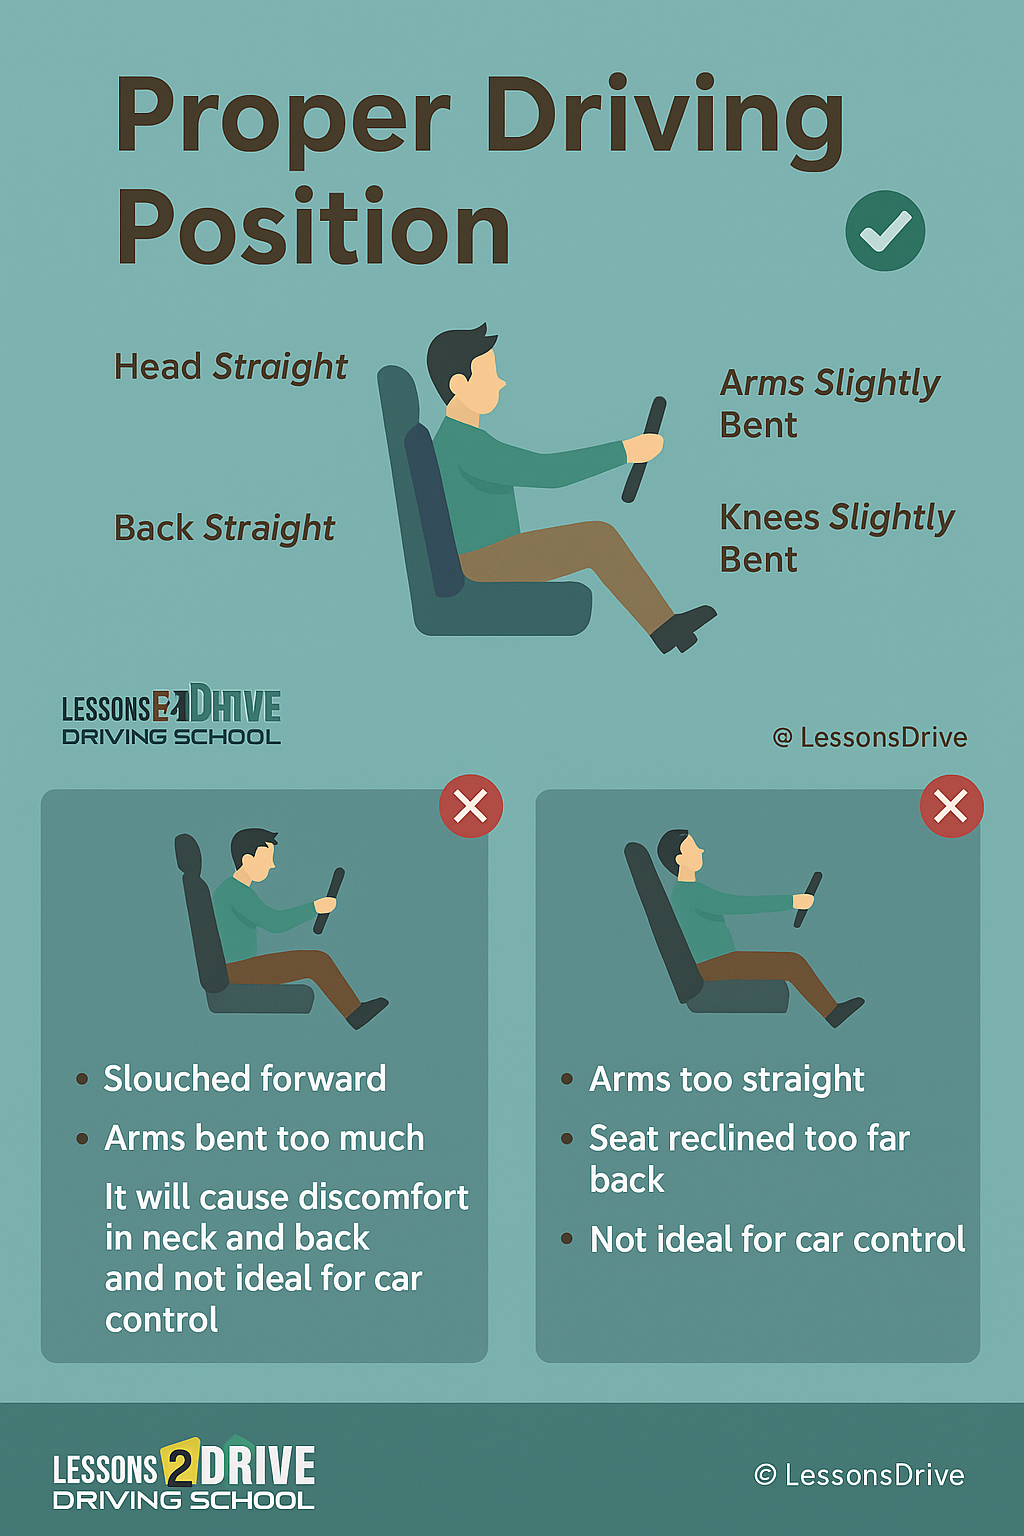
Most drivers sit in whatever position feels comfortable and never think about it again. But your seating position directly affects your ability to perform the specific movements the VicRoads drive test assesses — head checks, mirror scanning, smooth pedal control, and steering wheel reach. Getting your position right before you start the engine is the first thing the examiner watches you do. Here's what correct driving position looks like, why it matters for the criteria, and how to set it up properly every time.
⚡ What the VicRoads Pre-Drive Safety Check Requires
Before the drive test begins, the Licence Testing Officer directs the applicant to perform a pre-drive safety check. Part of this process is adjusting the seat and mirrors before starting the engine. The examiner observes this — a student who settles into the seat, adjusts their position, confirms their mirror coverage, and starts the engine calmly demonstrates that preparation is a habit rather than an afterthought.
Beyond the pre-drive check, your seating position affects three specific assessment items throughout the test:
Observation (head check): The head check requires turning your head over your shoulder to check blind spots. If your seat is too far reclined or your seatbelt is too tight across your shoulder, this movement is restricted — making the head check incomplete or visually ineffective.
Control: Smooth acceleration and braking — assessed throughout both stages — requires your heel to remain in contact with the floor while operating the pedals. If your seat is too far back, you lift your heel to reach the pedals, losing the leverage and feel needed for smooth progressive inputs.
Observation (mirror coverage): Mirror adjustments made before moving determine the coverage you have throughout the test. Mirrors adjusted for a slumped position will not provide the same field of view when you sit upright under assessment conditions.
The Five Position Adjustments — In Order
Always adjust in this sequence — each setting builds on the previous one. If you adjust your mirrors before setting your seat position, you'll need to readjust them after.
1
Seat Height and Fore-Aft Position — Pedals First
Start by adjusting how far forward or back the seat sits. The test is your feet — press the brake pedal fully to the floor. Your leg should have a slight bend at the knee, not fully extended. If your knee locks straight when pressing the brake fully, you are too far back. If your knee is sharply bent and cramped, you are too far forward.
The critical test for pedal position:
✓Your heel stays on the floor when pressing the accelerator and brake
✓You can press the brake fully without lifting your heel or locking your knee
✓For manual vehicles: you can fully depress the clutch without locking your knee
Why this matters for the Control criteria: The VicRoads criteria require smooth acceleration and deceleration throughout both stages. Smooth pedal application requires heel-to-floor contact — it gives you leverage and feel. Drivers who operate pedals on their toes have significantly less control over gradual pressure application, making smooth braking harder to achieve consistently.
2
Seat Angle and Back Support — Upright but Not Rigid
Set your seat back angle to approximately 100–110 degrees from vertical — slightly reclined but with your back firmly supported against the seat. A fully upright position (90 degrees) creates fatigue and tension. An excessively reclined position reduces your field of view over the dashboard and through the windscreen, restricts your ability to look left and right at intersections, and limits your head check range.
Lumbar support: Use your seat's built-in lumbar support — most modern vehicles have an adjustable lumbar setting. For vehicles without one, a small rolled towel or lumbar cushion at the small of your back achieves the same effect. The goal is maintaining the natural inward curve of your lower back rather than letting it flatten against the seat. This matters particularly during long supervised sessions where poor posture accumulates into pain and fatigue.
3
Steering Wheel Reach — Arms Slightly Bent at 9 and 3
Place both hands at the 9 o'clock and 3 o'clock positions on the steering wheel — this is the standard hand position that gives maximum control and the greatest range of movement for steering input. With your hands in this position and your back against the seat, your arms should have a slight bend at the elbow — approximately 120 degrees. Fully extended arms mean the wheel is too far; cramped, deeply bent arms mean it is too close.
If your steering wheel has tilt and reach adjustment: Adjust reach first (how far toward or away from you), then tilt (the angle). The wheel should not obstruct your view of the instrument cluster, and your wrists should comfortably rest on top of the wheel when your arms are straight — this is a quick check for correct reach distance.
Airbag safety distance: Maintain at least 25–30 cm between your chest and the steering wheel. Sitting too close to the wheel in a frontal collision means the airbag deploys into your face at close range rather than cushioning you from a distance. This is a safety requirement, not just a comfort preference.
4
Mirrors — Adjusted for Your Seated Position, Not Your Slouched One
Only adjust your mirrors after you have set your seat position — because mirrors adjusted while you're in the wrong position won't provide the right coverage when you're sitting correctly. Adjust your mirrors while sitting in your normal driving position with your back against the seat.
Internal (rear-view) mirror
Centre the mirror on the rear window. You should see the full rear window without moving your head — only moving your eyes. The top edge of the mirror should align with the top of the rear window.
Left external mirror
You should see a thin strip of your vehicle's left side along the inner edge, with the horizon line roughly in the middle of the mirror. Pointing the mirror too far left shows you the road behind you but misses vehicles in the adjacent lane.
Right external mirror
Same principle as the left — thin strip of your vehicle on the inner edge, horizon at mid-mirror. The right mirror is particularly important for the VicRoads criteria which require checking the relevant external mirror immediately before signalling for any lateral movement.
The blind spot that mirrors don't cover: Even perfectly adjusted mirrors leave blind spots — the areas beside and slightly behind both rear quarters of the vehicle. This is exactly why the VicRoads criteria require a head check before every lateral movement. Mirrors eliminate most of the risk; the head check eliminates the rest.
5
Headrest — Aligned with the Top of Your Head
The headrest is not a comfort feature — it is a safety device designed to prevent whiplash in a rear-end collision. Its effectiveness depends entirely on correct positioning. The centre of the headrest should align with the top of your head (not your neck or ears), and it should be as close to the back of your head as comfortable — ideally within 2–4 cm.
A headrest that sits too low or too far from your head provides almost no whiplash protection. In a rear-end collision, your body moves forward with the seat while your head stays momentarily behind — the headrest intercepts this movement. If it's positioned at neck level rather than head level, or is several centimetres away, it cannot do this effectively. Adjust it every time you adjust your seat.
⚡ What I Observed From the Examiner's Seat
"The pre-drive check told me a lot before the car moved. A student who adjusted their seat, confirmed their mirrors, buckled their seatbelt, and started the engine in a calm, practised sequence was demonstrating that these steps were habits. A student who fumbled with the seat lever, forgot to check their mirrors, or had to be prompted to start the engine showed me that the test environment was already creating cognitive load before we'd left the carpark."
"I also noticed that students in incorrect seating positions made worse head checks — they'd turn their head but from a reclined position their shoulder blocked part of their rear-side view, or they'd be sitting so far forward they couldn't turn fully. Position isn't just comfort. It determines what your body can physically do behind the wheel."
— Chamitha Lokuwithana, Ex-VicRoads Licence Testing Officer · Founder, Lessons2Drive
Quick Self-Check — Are You Positioned Correctly?
Run through these checks every time you get in the car — before you start the engine. It takes less than 60 seconds and becomes automatic within a few weeks of consistent practice.
I can press the brake fully without locking my knee or lifting my heel
My back is against the seat back and my lower back is supported
My arms have a slight bend at the elbows when holding the wheel at 9 and 3
I can see the full rear window in the internal mirror without moving my head
Both external mirrors show a thin strip of my car and the adjacent lane clearly
The headrest is aligned with the top of my head and close to it
I can turn my head fully over each shoulder for a head check without restriction
My seatbelt is fastened and sits across my shoulder — not behind me or under my arm
The Three Most Common Positioning Mistakes in Learner Drivers
Sitting too far back — the "relaxed" position
The most common mistake. Students push the seat back to feel less cramped and more relaxed. The result: pedal operation requires pointing the toes rather than using the whole foot, smooth braking becomes very difficult, and reaching the steering wheel causes leaning forward away from the seat back — which then makes the head check harder. Fix: adjust forward until the heel stays down on the brake fully pressed.
Over-reclining the seat back
A reclined seat looks cool and feels casual but reduces forward visibility over the dashboard and through the windscreen. More significantly, it restricts the rotation needed for a head check — your shoulder on the reclined side blocks some of your rear view. The VicRoads criteria require looking through the side window — not just a quick neck turn. From a reclined position, full window visibility is harder to achieve.
Adjusting mirrors for the wrong position
Students often adjust mirrors when they first get in, before adjusting the seat. Then they adjust the seat and never readjust the mirrors. The result is mirrors calibrated for a slightly different head position — external mirrors that show too much sky or too much ground, or an internal mirror that's angled slightly wrong. Always adjust seat first, then mirrors, in that order, every time.
Get your position right from lesson one
Book a Lesson with Lessons2Drive
In your first lesson, we cover vehicle setup — seat, mirrors, headrest, seatbelt — before the car moves. We connect every element of your position to the VicRoads assessment criteria it affects. Founded by an ex-VicRoads Licence Testing Officer. Serving Melbourne's west and north. All instructors hold Working With Children Check.
📞 0400 008 706
✉ Info@Lessons2Drive.com.au
🌐 lessons2drive.com.au