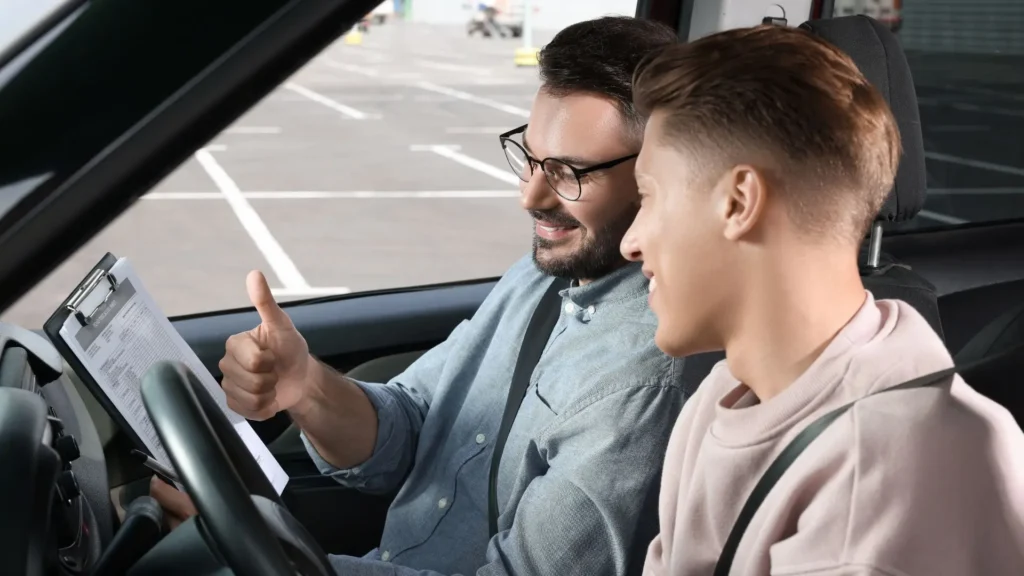
Written by
Chamitha Lokuwithana — Ex-VicRoads Licence Testing Officer
1,800+ official drive tests conducted · Founder, Lessons2Drive
I conducted over 1,800 official VicRoads drive tests as a Licence Testing Officer. Most people who failed could drive. They failed because of 12 specific, documented mistakes — every one of them defined in the official VicRoads Drive Test criteria. Here is exactly what they are, what the criteria actually say, and how to make sure they don't happen to you.
A Real Student Story
One student came to us after failing her VicRoads test three times. On each attempt, she failed for the same observation issue — nobody had ever explained to her exactly what the examiner was watching for. After two lessons with Lessons2Drive, she understood the real criteria. She passed first time. That's why this article exists.
Read through all 12 mistakes below and keep a mental count of how many apply to you.
If it's 3 or more, you're at real risk of failing — and every single one is fixable before your test day.
Severity:
🔴 Immediate Termination — test ends on the spot
🟡 Critical Error — accumulate too many and you fail
🟢 Minor Error — marks deducted
Important: The VicRoads Drive Test has two levels of error. A Critical Error ends your test if you commit more than one in Stage 1, or more than two across the entire test. An Immediate Termination Error ends your test the moment it happens — no matter how well you've driven up to that point.
1
Not Doing a Head Check Before Moving Laterally
🔴 Immediate Termination Error (if another road user takes evasive action)
The VicRoads criteria are very specific about this. When diverging — which means any lane change, merge, or lateral movement of at least a car width — you must check your internal mirror, the relevant external mirror, and then perform a head check (looking over your left or right shoulder through the side window) immediately before moving. The head check must happen immediately before the movement — not a few seconds earlier.
⚡ What the Criteria Actually Say
If you fail to check the mirrors AND fail to do a head check before diverging and another road user takes evasive action, the examiner records an Immediate Termination Error (Fail to Give Way) and your test ends immediately. Even if no one takes evasive action, a Critical Error (Fail to Look) is recorded. The head check is also required when pulling out from the kerb — it must be done immediately before moving, not several seconds earlier.
⚡ LTO Insider — From Chamitha
"This was one of the most common failure points I saw. Students would check mirrors but forget the head check, or do the head check too early then drift. The criteria say 'immediately before moving' — and they mean it. I was watching for both, every single time."
Fix it: Build a consistent sequence: internal mirror → external mirror → signal → head check → move. The head check is the last thing you do before the wheel turns. Practise this on every single lane change until it's automatic.
2
Not Signalling — Even When No Other Vehicles Are Present
🟡 Critical Error (Fail to Signal)
The VicRoads criteria require a signal at least 3 seconds before turning, changing lanes, pulling into the kerb, or diverging by at least a car width. When pulling out from a parked or stationary position, you must signal for at least 5 seconds before moving. Critically — the criteria state that indicator use is required even if no other traffic is present.
⚡ What the Criteria Actually Say
There is a distinction the criteria make that most students don't know: if you signal but do it too early or cancel it too soon, the examiner records No for Signalling but does NOT record a Critical Error. A Critical Error (Fail to Signal) is only recorded when you omit the signal altogether. However, you also must not signal so early that it misleads other drivers about which street you intend to turn into.
Fix it: Signal every time — every turn, every lane change, every time you pull away from or into the kerb. For roundabouts, the direction of your signal depends on which exit you're taking: left signal for the first exit (if less than halfway around), no signal for the halfway exit, right signal for exits more than halfway around. These rules catch a lot of students off guard.
3
Rolling Through a Stop Sign Without Actually Stopping
🔴 Immediate Termination Error (Fail to Stop)
The VicRoads criteria make the distinction very clearly. If you drive past a Stop sign without clearly showing an intention to stop, the examiner records an Immediate Termination Error (Fail to Stop) and your test ends — regardless of whether there is any other traffic present. But there is also a separate error for an Incomplete Stop: if you slow right down and the car pauses but your wheels don't fully stop moving, that is recorded as a Critical Error.
⚡ What the Criteria Actually Say
A complete stop means wheels motionless, behind but within 2 metres of the stop line. Stopping partly over the stop line (but not into the pedestrian crosswalk) is also recorded as an Incomplete Stop — a Critical Error. If you stop over the stop line and intrude into the pedestrian crosswalk, that becomes a Block Pedestrian Crosswalk error.
⚡ LTO Insider — From Chamitha
"Many students think they stopped. They didn't. The wheel is still rolling at 2 km/h as they check for traffic. That counts as a fail in the criteria. I had to mark it every time I saw it — even when I could see the student genuinely believed they had stopped."
Fix it: Count "one thousand and one" after you come to a stop. If you're still saying it while moving, you haven't stopped. Wheels must be completely still before you check for traffic and move off.
4
Choosing an Unsafe Gap in Traffic
🔴 Immediate Termination Error (Fail to Give Way)
Gap selection is formally assessed in the test. The criteria say you must select the first available safe gap after an initial period of observation — and reject any unsafe gaps. Both errors matter: taking an unsafe gap ends your test. But there is also a lesser-known error — waiting too long and missing a safe gap that you should have taken. That's recorded as No for Gap Selection.
⚡ What the Criteria Actually Say
If your gap selection is so poor that another road user has to take evasive action (swerve, brake, slow), the examiner records an Immediate Termination Error (Fail to Give Way). The criteria also clarify that you are not penalised for missing a gap that appeared before you had a reasonable opportunity to observe approaching traffic — for example, a gap that existed the moment you arrived at a Stop sign before you'd had time to check.
⚡ LTO Insider — From Chamitha
"Students who rushed into an unsafe gap often did so because they didn't want to look slow or indecisive in front of the examiner. The opposite is true — VicRoads always values safety over speed. Waiting an extra 10 seconds at a give way line is far better than forcing a termination."
Fix it: Only go when the gap is genuinely safe. But also build the confidence to take a safe gap when it's there — hesitating through multiple safe gaps is also penalised. Practice on your actual test route matters enormously here.
⚡ LTO Insider Observation — Chamitha Lokuwithana
"After 1,800+ tests, I could tell within the first few minutes whether someone was going to pass. It wasn't the big obvious mistakes that gave it away — it was the small automatic habits: the mirror check at the right moment, the signal timing, the natural head position during a lane change. Those habits are built through structured practice, not just seat time."
— Chamitha Lokuwithana, Ex-VicRoads Licence Testing Officer · Founder, Lessons2Drive
5
Driving Too Slowly — Unnecessary Stops and Crawling Below the Limit
🟡 Critical Error (Too Slow)
Most students fear being too fast. But driving too slowly is also a Critical Error. The criteria specify three specific situations that trigger a Too Slow error: travelling at 10 km/h or more below the speed limit for a substantial part of the stage; remaining stopped for more than 5 seconds when the green light is showing, all give-way traffic has cleared, or queued vehicles in front have moved off; and stopping unnecessarily before a pedestrian crossing or children's crossing when no pedestrian is present or approaching.
⚡ What the Criteria Actually Say
The Too Slow Critical Error is only recorded once per stage — but it will be recorded. There is an exception: if road or traffic conditions (wet road, congested traffic, unsealed road) genuinely make it unsafe to drive closer to the speed limit, no penalty applies. Conditions must be the cause — nervousness is not an accepted reason.
Fix it: Build confidence to drive at or close to the posted speed limit when conditions are suitable. When the light goes green, move off promptly. When the crossing is clear, proceed without stopping. Decisiveness is part of what VicRoads is assessing.
6
Exceeding the Speed Limit
🔴 Immediate Termination Error (Excessive Speed)
There are three separate speed thresholds in the VicRoads criteria that each trigger an Immediate Termination Error. You cannot exceed the speed limit continuously for 5 seconds or more. You cannot exceed it by 5 km/h or more at any time, regardless of duration. And in a school zone, you cannot exceed the limit by any margin for any duration — even 1 km/h, even for one second — during operating hours.
⚡ What the Criteria Actually Say
Speed advisory signs (yellow diamond warning signs) do not set a speed limit. You are not required to drive at or below an advisory speed if conditions allow you to proceed safely at a higher speed. These are often confused with speed limit signs. Only regulatory speed limit signs (white rectangle with black numbers) count for the test.
⚡ LTO Insider — From Chamitha
"Speed awareness isn't just reading signs. It's adjusting for conditions — rain, school zones, heavy traffic. The most common speed terminations I saw happened on downhill sections where students let the car drift above the limit without noticing. Learn your test route — know where the speeds change and where the hills are."
Fix it: Know every speed zone on your test route. On downhill sections, actively manage your speed rather than letting the car creep up. School zones are zero tolerance — if operating hours apply, treat them as absolute.
Already failed your VicRoads test?
We specialise in students who have failed before. Our founder used to be the examiner — he knows exactly what went wrong and exactly how to fix it before your next attempt.
See how we help →
7
Wrong Lateral Position — Cutting Turns and Lane Positioning Errors
🟡 Critical Error / 🔴 Immediate Termination if dangerous
Lateral Position is assessed both as a Task Assessment Item for specific manoeuvres and as a Stage Assessment Item throughout each stage. The rules are precise. When turning right, you must keep left of the centre line when entering and leaving the intersection. On a road with no marked lanes, you must enter the intersection as near as practicable to the centre line. When turning left, you must not cross the centre line of either road. You must maintain a 1.2 metre clearance from parked vehicles whenever possible — equivalent to a car door width.
⚡ What the Criteria Actually Say
The Stage Assessment Item for Lateral Position is lenient — up to two breaches across the stage are allowed before it becomes a No. But if one of those breaches occurs during an assessable task, it's also recorded as No for that specific task item. Three or more breaches in a stage means No for the stage-level item. Importantly, if you cut a right turn so severely that there's oncoming traffic, it can escalate to an Immediate Termination Error (Other Dangerous Action or Intervention).
Fix it: Give yourself time on turns — position before you turn, not during it. Keep 1.2 metres from parked cars consistently. On right turns in roads without marked lanes, move to near the centre line before turning. These are learnable with deliberate practice on the actual test route.
8
Parking Errors — Mounting the Kerb or Too Far From It
🟡 Critical Error (Mount Kerb) / 🔴 Immediate Termination if 2+ wheels mount
The reverse parallel park is one of the most precisely defined tasks in the entire criteria. You must complete it in no more than 4 vehicle movements and within 2 minutes. You must not reverse more than 7 metres behind the rear of the vehicle in front. You must finish with both left wheels within 300mm of the kerb, and the front of your car between 1 and 2 metres behind the vehicle in front.
⚡ What the Criteria Actually Say
There is a difference between touching the kerb and mounting it. Light tyre contact with the kerb that doesn't cause discomfort to occupants and doesn't result in a wheel mounting carries no penalty. But if one wheel mounts the kerb and no road user takes evasive action, that's a Critical Error (Mount Kerb). If two or more wheels mount, or one wheel mounts and someone takes evasive action, the test ends immediately as a Collision. Also: you must look out the rear window immediately before reversing — this is a separately assessed item (Parking Observation).
Fix it: Learn reference points for the reverse park that work consistently. Don't rush — the 2-minute limit is generous. Signal before stopping to park, signal before leaving. Look out the rear window before reversing, every time without exception.
The Difference Between Passing and Failing
"The students who passed in my years at VicRoads weren't necessarily the most talented drivers. They were the most prepared ones. They understood what the examiner was looking for — not because someone had told them vague tips, but because they'd been trained on the actual criteria. Preparation is the only variable you can fully control."
— Chamitha Lokuwithana, Ex-VicRoads Licence Testing Officer · 1,800+ tests conducted · Founder, Lessons2Drive
9
Blocking a Pedestrian Crosswalk
🟡 Critical Error / 🔴 Immediate Termination if pedestrian takes evasive action
Stopping on or partly on a children's crossing, pedestrian crossing, or marked foot crossing is a Critical Error (Block Pedestrian Crosswalk). If a pedestrian has to stop, slow, turn back, hurry, or walk around your vehicle as a result, it escalates to an Immediate Termination Error (Stop at Dangerous Position) and your test ends immediately.
⚡ What the Criteria Actually Say
There is one exception: if you genuinely cannot see approaching traffic without moving forward onto the crosswalk (such as at some left-turn slip lanes), the first queued vehicle may stop on the crosswalk. But you must take all reasonable care to ensure no pedestrian has to take evasive action. This exception applies only to the first vehicle in a queue — if another vehicle is already at the crosswalk and you're queuing behind it, you must not encroach onto the crossing until the first vehicle has departed.
Fix it: Stop before the crosswalk, every time. If you're in a queue at traffic lights, leave enough space so you don't creep forward into the crossing area when traffic starts moving. Know where the crosswalks are on your test route.
10
Following Too Close — Not Keeping the 2-Second Gap
🟢 Minor Error (Task Assessment Item — No for Following Distance)
The Following Distance item is assessed for straight drives. In good conditions, you must maintain at least a 2-second gap behind the vehicle ahead. In poor conditions (wet or unsealed road), this increases to a minimum of 3 seconds. After a lane change, you must resume the correct following distance as soon as practicable.
⚡ What the Criteria Actually Say
Following Distance is assessed as a Task Assessment Item — it's only formally recorded during an assessable straight drive. If there's no vehicle within 5 seconds ahead, the item is recorded as N/A. While this is not a Critical Error in itself, consistently poor following distance signals to the examiner that your hazard awareness is underdeveloped, which can affect other items being scored.
Fix it: Pick a fixed object on the road ahead — a sign, a line, a shadow. When the car in front passes it, count "one thousand and one, one thousand and two." If you reach the object before you finish counting, you're too close. Move back. Make this a habit on every straight drive.
11
Jerky, Unsmooth Vehicle Control
🟢 Stage Assessment Item — No if 3+ breaches in a stage
Control is assessed as a Stage Assessment Item — the examiner watches your control throughout the entire stage, not just during specific tasks. The criteria require smooth acceleration and deceleration throughout. For manual vehicles, this also includes not labouring or over-revving the engine, smooth clutch operation, and not coasting in neutral or with the clutch disengaged for more than 50 metres unnecessarily.
⚡ What the Criteria Actually Say
Up to two Control breaches in a stage is still a pass for that item. Three or more means No. This is generous compared to other criteria — but if nervousness is causing you to brake suddenly, accelerate sharply, or bunny-hop at intersections repeatedly, those add up quickly. For manual drivers, coasting in neutral or with the clutch down for over 50 metres is specifically prohibited.
⚡ LTO Insider — From Chamitha
"Nervousness often shows itself in vehicle control first. The fix isn't 'try to relax' — it's preparation. When you've driven the test route many times under assessment-style conditions, the familiarity removes the surprise, and the control comes naturally. We run full mock tests for exactly this reason."
Fix it: Practise smooth braking by looking ahead further — the earlier you see a hazard, the smoother your response. For manual drivers, never coast out of gear approaching an intersection. Select the right gear early and brake progressively.
12
Doing Something Dangerous — The Catch-All That Ends Tests Unexpectedly
🔴 Immediate Termination Error (Other Dangerous Action)
Beyond the named errors, there is a category called Other Dangerous Action that catches behaviours the other errors don't specifically cover. The criteria define this as any action that causes another road user to take evasive action, causes immediate danger to road users or property, would cause immediate danger if the examiner didn't intervene, or unnecessarily increases the risk of a collision. Common examples include: stopping on a railway level crossing while waiting for traffic ahead to move, overtaking across double barrier lines before a blind curve or crest, drifting onto the wrong side of the road approaching an intersection, and stopping unexpectedly in traffic causing a vehicle behind to brake heavily.
⚡ What the Criteria Actually Say
There is an important exception in the criteria: if you create a situation that would have been dangerous if more traffic were present, but is not immediately dangerous because no traffic is present, an Immediate Termination Error is NOT recorded. The danger must be actual and immediate — not hypothetical. This matters for students who drift slightly wide on a quiet street — as long as there's no approaching traffic and a clear view, this is a lateral position error but not a termination.
Fix it: Never stop on a railway level crossing even in slow-moving traffic. Never overtake when you cannot see the road clearly ahead. When you give way to a right-turning vehicle unnecessarily, check your mirrors first — don't create a surprise for the car behind you. Awareness of what's behind you is just as important as what's in front.
How many of those 12 apply to you?
😊
0–2 mistakes: You're in good shape. A mock test under real assessment conditions will confirm you're ready.
⚠️
3–5 mistakes: You're at risk. A targeted lesson focused on the specific criteria will make a significant difference before your test.
🚨
6+ mistakes: Don't book your test yet. Book an assessment lesson first — we'll be honest about where you stand and build a focused plan to get you ready.
Ready to fix every one of these mistakes?
Train with the Driving School Founded by an Ex-VicRoads Licence Testing Officer
At Lessons2Drive, we don't just prepare you to drive. We prepare you with the inside knowledge of what VicRoads examiners actually look for — because our founder used to be one of them, conducting over 1,800 official drive tests.
✓ Mock tests with real VicRoads marking criteria
✓ Trained to the same standard as VicRoads examiners
✓ 304 five-star Google reviews
📞 0400 008 706
✉ Info@Lessons2Drive.com.au
🌐 lessons2drive.com.au